Table of Contents
Actionable Steps to Choose and Build with a Website Builder
Got a groundbreaking business concept, a passion project you’re eager to share, or a personal brand waiting to make its mark online? The prospect of starting can feel daunting when faced with a blank digital canvas. Fortunately, by 2025, website builders have transformed into remarkably powerful yet incredibly user-friendly tools. They empower virtually anyone, regardless of technical expertise, to design visually stunning and fully functional websites without needing to write a single line of code. Whether your goal is to launch an e-commerce empire, showcase your creative work, or cultivate a thriving blog, the right website builder can bring your vision to life with surprising speed.
This in-depth guide will lead you through each essential step for selecting the ideal website builder and constructing a site that not only looks polished but also achieves tangible results. We’ll cover everything from pinpointing your specific needs to successfully launching and maintaining your digital footprint, offering practical advice, real-world illustrations, and insightful perspectives to make the entire process engaging and straightforward. Let’s embark on this journey to get your website up and running!
Step 1: Pinpointing Your Website’s Purpose and Requirements
Before you even start browsing website builder platforms, dedicate time to clearly define what you aim to accomplish with your site. This crucial initial step ensures you select a tool that directly supports your objectives, saving you considerable time and potential frustration down the road.
Begin by asking yourself some fundamental questions: What is the primary reason for your website’s existence? Is it to sell products directly, display your achievements, capture potential customer interest, or disseminate information? For example, if you’re an artist aiming to create a portfolio, you’ll want to prioritize features that showcase high-quality visuals and simplify image uploads. Conversely, if you’re launching an online shop, e-commerce functionalities such as secure payment processing and inventory management will be paramount.
Next, consider your target audience. Who are they, and how will they interact with your website? A digitally savvy demographic might appreciate dynamic, interactive elements, while a broader audience will likely prefer simplicity and seamless mobile responsiveness. Also, think about future growth prospects—will your website need to accommodate increasing traffic or expanded features down the line?
Your budget is another critical consideration. Website builders range from free plans with limited features to premium packages with advanced tools and flexibility. Be sure to account for additional expenses such as domain name registration and any premium add-ons or plugins you may need.
Finally, honestly assess your technical comfort level. If you’re a complete beginner, prioritize builders with intuitive drag-and-drop interfaces. Those with more advanced skills might appreciate platforms that allow for custom code integration. Create a checklist of your essential features: robust SEO tools, integrated blogging capabilities, user-friendly contact forms, reliable analytics tracking, and so forth. This checklist will serve as your guiding compass as you evaluate different options.
By thoroughly defining these elements upfront, you’re laying a solid foundation for success. Many individuals skip this phase and subsequently find themselves needing to switch website builders, which inevitably leads to wasted effort. Ensure you’re not one of them—dedicate 30 to 60 minutes to thoughtful brainstorming, and you’ll undoubtedly appreciate the foresight later.
Step 2: Exploring Leading Website Builders
With your strategic goals clearly established, it’s time to delve into the available market. In 2025, the website builder sector is highly competitive, offering solutions tailored to nearly every niche imaginable. Based on expert analyses and user feedback, some of the prominent players include Wix, Squarespace, Shopify, WordPress.org, Hostinger, and Webflow.
Begin your exploration by visiting the official websites of each builder. Pay close attention to their listed features, the variety of templates they offer, and any provided case studies. For instance, Wix stands out with its extensive library of over 800 templates and AI-driven design assistants, making it an excellent choice for visually oriented projects. Squarespace is renowned for its elegantly designed, professional-quality templates, perfect for portfolios and blogs. Shopify, on the other hand, is the undisputed leader in e-commerce, offering comprehensive tools for inventory management and secure transactions.
Seek out independent reviews on reputable tech sites or user forums like Reddit to gain unbiased perspectives. Pay attention to comments regarding ease of use, the quality of customer support, and overall website performance. User discussions can often highlight potential drawbacks, such as slow loading speeds or unexpected charges.
Stay informed about emerging trends. Artificial intelligence integration is a significant development in 2025—builders like Hostinger leverage AI to generate entire websites based on simple prompts, dramatically accelerating the setup process. If environmental sustainability is a priority for you, investigate builders that emphasize eco-friendly hosting solutions.
Compile a shortlist of 3 to 5 website builders that appear to align best with your identified needs. This focused research phase typically requires a few hours but is invaluable in preventing decision fatigue later on.
Step 3: Conducting a Feature-by-Feature Comparison
Now, it’s time for a detailed analysis. Create a comparison chart to systematically evaluate your shortlisted builders across critical categories. This visual approach will make the distinctions between platforms exceptionally clear.
Feature | Wix | Squarespace | Shopify | WordPress.org | Hostinger |
Ease of Use | Drag-and-drop, very beginner-friendly | Intuitive editor, minimal learning curve | Optimized for e-commerce, straightforward | Requires more setup, highly flexible with plugins | AI-assisted, extremely easy for novices |
Templates | 800+ highly customizable | 100+ premium, sophisticated designs | 100+ specialized e-commerce themes | Thousands available through themes | AI-generated or pre-designed options |
E-commerce | Integrated store, payment options | Built-in selling tools | Advanced inventory, extensive app store | Robust via WooCommerce plugin | Basic store functionalities |
SEO Tools | Strong built-in capabilities | Good meta tag and sitemap management | Excellent for online stores | Best with specialized plugins like Yoast | Basic but functional |
Pricing (Start) | $16/month | $16/month | $29/month | Free (requires separate hosting) | Starting from $2.99/month |
Scalability | Suitable for small to medium sites | Handles growth effectively | Designed for enterprise-level operations | Highly scalable with proper management | Cost-effective scaling |
This table serves as a starting point; customize it further based on your specific research findings. Concentrate on the essential features you identified in Step 1. For SEO considerations, verify if the builder permits custom title tags, alt text for images, and mobile optimization. If e-commerce is your focus, confirm seamless integration with payment processors like Stripe or PayPal.
Security is non-negotiable. Look for features such as SSL certificates, regular backups, and robust malware protection. Customer support quality can vary significantly; Wix offers 24/7 assistance, whereas WordPress primarily relies on community forums for support.
If you have some technical proficiency, test the platform’s capacity for custom code integration. Webflow, for instance, allows for direct CSS and HTML manipulation for incredibly precise design control.
This comparative analysis may lead you to a clear frontrunner or highlight specific trade-offs, such as investing more for superior functionality.
Step 4: Evaluating Cost and Overall Value
Budgetary considerations are paramount, so conduct a thorough examination of the pricing structures offered by each platform. Most website builders present tiered plans, ranging from free or basic options suitable for initial testing to premium packages offering full feature sets.
Deconstruct the costs associated with each plan: What exactly is included? Wix’s “Light” plan typically offers a custom domain and basic analytics, while the “Unlimited” plan provides expanded storage. Squarespace’s entry-level plan includes unlimited bandwidth, though lower-tier options may include transaction fees.
Step 5: Be mindful of potential hidden expenses
Domain name renewal fees, the cost of premium templates, or charges for essential app integrations. If you require advanced functionality for your Shopify store, the costs associated with various apps can accumulate quickly.
Focus on the overall value proposition – does the chosen builder help you save money or time in other areas? WordPress.org itself is free, but you’ll need to purchase separate hosting from a provider of your choice. This approach can be more cost-effective in the long run for websites that require significant scalability.
Investigate available discounts: Many platforms offer savings of 20-30% when you commit to annual billing, and most provide satisfaction guarantees or money-back periods. Calculate the total projected cost over a year and compare it against the budget you established in Step 1.
Remember, the least expensive option isn’t always the most beneficial. It’s often wiser to invest in a website builder that can grow alongside your project, thereby avoiding the considerable hassle of migrating your site later on.
Stage 6: Solidify Your Digital Foundation and Get Set Up
With your website creation tool chosen, it’s time for action! Select a subscription tier, considering an annual commitment for potential cost savings. Integrate your domain name during the initial configuration. If you haven’t secured a domain, you can acquire one directly through your chosen platform or a dedicated registrar like GoDaddy.
For domains registered elsewhere, ensure your DNS configurations are accurate. Install any essential applications or add-ons your site requires. For systems such as WordPress, pick a design template and incorporate plugins like Elementor to facilitate drag-and-drop page design. Regularly back up your progress, even in the early stages, as a safeguard against potential data loss, irrespective of automatic saving features.
This initial setup, typically completed in under an hour, paves the way for your website’s development.
Stage 7: Architect Your Site’s Layout and Content Strategy
Embarking on website creation without a plan is a key to constructing a building without architectural drawings. Begin by sketching out your site’s structure: a main landing page, an “About Us” section, details on your services or products, a blog, and a contact portal. Prioritize intuitive navigation by limiting your main menu to five to seven items, enabling visitors to locate information effortlessly. Meticulously plan your content – craft compelling headings, articulate your message clearly, and incorporate strong calls to action (CTAs) such as “Purchase Now” or “Get in Touch.” Gather high-resolution images, video assets, and your brand logo.
Initiate your search engine optimization (SEO) efforts by researching relevant keywords using tools like Google Keyword Planner and weaving them organically into your text. For blog content, establish a publishing calendar to maintain consistency and draw in readers.
This strategic planning, typically requiring two to four hours, will streamline your workflow regardless of the website builder you utilize.
Stage 8: Select and Tailor Your Site’s Visual Identity
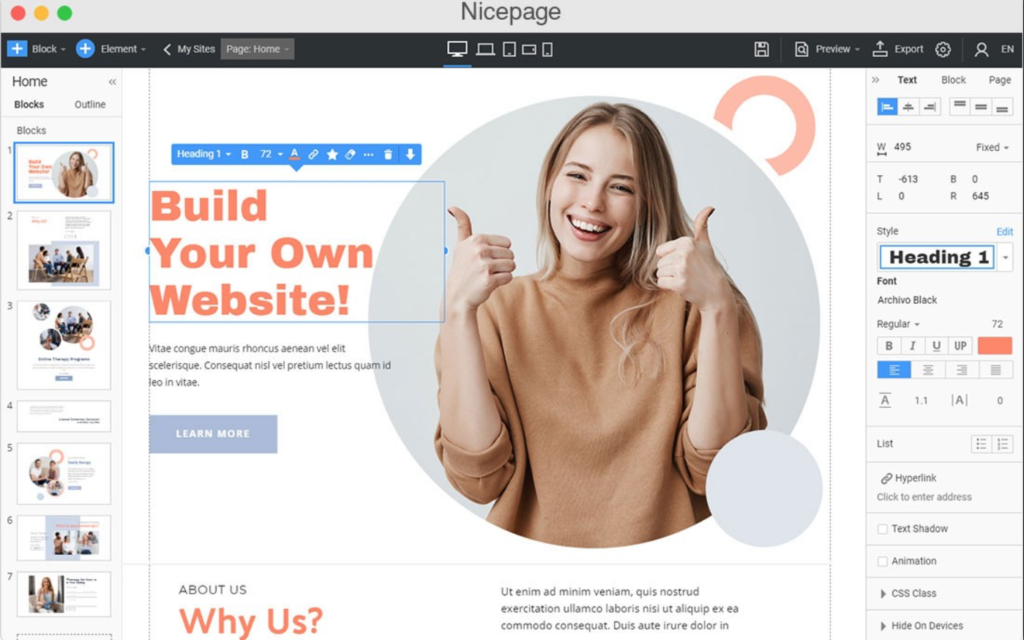
Website templates serve as the bedrock for your site’s aesthetic. Explore options that align with your specific industry – e-commerce templates for online stores, or creative layouts for showcasing portfolios. Choose a template that closely resembles your desired outcome, as modifications are generally more manageable than starting from a blank slate. On platforms like Wix or Squarespace, you can preview and adjust your design in real-time. Modify colors, typography, and layout arrangements to accurately reflect your brand identity.
Ensure brand consistency by incorporating your logo in the header and employing a harmonious color scheme. Integrate distinct sections, such as prominent banner areas, image galleries, or client testimonials. Verify that your design is responsive, adapting seamlessly to various screen sizes including mobile phones and tablets.
Refrain from excessive customization at this juncture; focus on refining the design as your content evolves.
Stage 9: Construct Your Pages and Navigation System
Systematically build out your site’s essential pages. Your homepage should immediately capture attention with a clear directive. The “About” page offers an opportunity to share your narrative and introduce your team. Pages dedicated to your “Services” or “Products” should provide comprehensive details, pricing information, and compelling visuals – consider using bullet points for enhanced readability. Establish a blog section, complete with relevant categories and an initial piece of content. Your “Contact” page should include a functional form, an embedded map if applicable, and links to your social media profiles.
Interconnect all your pages through the main navigation menu, and incorporate a footer containing copyright information, essential links, and contact details.
Rigorously test all hyperlinks to prevent user frustration caused by broken connections.
Stage 10: Integrate Key Functionalities and Third-Party Tools
Enhance your website’s capabilities by leveraging the features offered by your chosen builder. Implement fundamental SEO techniques: craft compelling meta descriptions, optimize your headings, and add descriptive alt text to images. For e-commerce operations, configure product listings, categorize items, and establish shipping parameters on platforms like Shopify. Integrate secure payment processing solutions. Incorporate analytics tools, such as Google Analytics, to monitor visitor behavior and website traffic.
Utilize tools like Mailchimp to add lead capture forms or newsletter subscription options. Embed social media feeds or relevant video content where appropriate. Prioritize security by enabling SSL encryption and implementing CAPTCHA on forms to deter spam.
These additions will contribute to a robust and user-friendly online presence.
Stage 11: Refine Performance and Search Engine Visibility
Website speed is paramount; strive for load times below three seconds. Achieve this by compressing images and minimizing the use of excessive plugins. Ensure your site is mobile-friendly through a responsive design. Adhere to SEO best practices: create unique, informative page titles, naturally integrate relevant keywords, and establish both internal and external links.
Propagate your site map to search engines. Improve accessibility by incorporating alt text, utilizing readable fonts, and enabling keyboard navigation. Utilize tools like Google PageSpeed Insights to identify and address performance bottlenecks.
A well-optimized website, built with a reliable platform, will achieve higher search engine rankings and foster greater user engagement.
Stage 12: Conduct Comprehensive Pre-Launch Testing
Perform a thorough review of your entire website. Examine all pages across different devices and web browsers to ensure consistent rendering. Test all interactive elements, including links, forms, and the e-commerce checkout process. Solicit feedback from friends or a select group of beta testers and promptly address any identified issues. Execute a final backup using your website builder’s available tools.
Diligent testing is crucial for a seamless and successful website launch.
Stage 13: Initiate Your Site and Begin Promotion
The moment has arrived to go live! Announce your website’s launch across your social media channels and to your email subscriber list. Submit your site to search engines and configure your Google Search Console account. Continuously monitor your website analytics to fine-tune performance and user experience.
A strategically promoted website will maximize the return on your website builder investment.
Stage 14: Ongoing Website Management and Evolution
Websites require continuous attention to remain effective. Regularly update your content, verify the integrity of all links, and keep your plugins and themes current. Ensure timely renewal of your domain name and subscription plans.
As your business expands, introduce new features and monitor key metrics to scale your operations accordingly, especially if traffic volume increases. Schedule regular backups and security assessments to safeguard your site.
Consistent maintenance ensures that your chosen website builder effectively supports your long-term online objectives.
Leave a Reply